I love to sew, mainly quilts and bags. I am 66, married to Fred and have one son, Matthew, who is 27. I enjoy embroidery and applique and prefer to machine piece and quilt my projects. I love my vintage Singer sewing machines especially my Featherweight 222K. I’m enjoying treadling on my 201K Singer and I collect Miniature Sewing Machines and currently have three Essex , one Singer 20, one Singer 40, two Vulcan Miniatures and my latest, a Grain. My love of sewing I believe comes from my Grandmother - I still have the drawings she made for me to embroider on tea towels many many years ago!
Showing posts with label Royal Critters. Show all posts

Saturday, 24 November 2012

ONCE UPON A TIME.......

THERE WERE FIVE BEARS....

Okay, I know there were only three but in my story there are five!  okay?

and here is the first bear ...

THE BEARY BUNCH
Pattern by Toni Alexander
The Red Boot Quilt Company
link HERE
Poor little thing looks a bit washed out in this pic but in reality he is quite a bright bear!

I have previously made two of these quilts,  both in boy colours:-

This is the quilt I donated to Blair's Wish Foundation
I don't have a photo of the other quilt as it is only a flimsy at present, waiting to be quilted.

So who will be on the receiving end of this quilt you might just ask????     Our beautiful little Maisy of course!   Hey, I'm Aunty Hen and I can make as many quilts as I like for the little darling!  You may recall, Maisy already has three quilts from me (Royal Critters, Lullaby in the Night Sky and just lately the bright orange Toy Twist quilt -Hey Diddle Diddle) plus a stack of little pram quilts I whipped up in a hurry one day, terrible photo ..
Pram quilts (two fat quarters layered, quilted and bound-
great for practicing free motion quilting)

This quilt will be ready for Christmas I hope.

I tried something different with the Applique method this time - I used the "soft or window applique" technique.   This makes for a much softer feel to the applique therefore making it so much easier to blanket stitch the parts where there are lots of layers.  I cut the teddy head and body using the soft window method and I have found that it is certainly much easier to stitch through all of the layers.  It feels kind of strange holding the block as I stitch, as I am used to it feeling much firmer, but I'm getting used to it now.  A good test for this method was the eyes and nose of the teddy -  lots of layers but it was so easy to stitch without the fusible web being behind every piece.  I could have used the soft method on the muzzle too, might try that on the next bear I build.


UPDATE ON FRED:-          He started back on chemo last Monday (same as last time, plugged in for three days - wears the device home).  It seems to be having more of an effect on him this time but that's to be expected following a major surgery I guess.  He's feeling a little woozy and off colour.    The chemo will go on for 12 weeks so we will be having a low key Christmas.


Cheers for now,
Happy Sewing,
Helen


Thursday, 11 August 2011

IT'S FUNNY HOW TIME SLIPS AWAY......

FLANNEL QUILT

It's almost three weeks since I last posted!!  good grief.... what HAVE I been up to?

Well, I just now put the final stitches in the binding of my Flannel Quilt - this one is just for me!  I had a heap of flannel fabrics that I bought years ago and I decided that they needed to be made into a quilt instead of just sitting in the plastic box.. so here it is!!  I had fun quilting this one... I decided to try using InvisiFil WonderFil 100wt in the top as well as the bobbin and boy oh boy, did I learn a few things!!  Firstly, you need to use a  60/8 sharps needle with this thread and you also need to loosen the top tension quite a bit.  Sadly, I didn't learn these things until I was almost finished quilting the quilt!  The good thing is that the InvisiFil thread just disappears into the quilt, so you can't really see all of the starts and stops (and there are many!!).  I should add that I have never had any problems with this thread when I have used it in the bobbin only).   The weather has turned cool again, so I will be able to snuggle under this quilt tonight while I watch some tele!

On August 3rd my sister and I had our sales/display table at our Mum's Nursing Home pretend Ekka day.  Brisbane is quite famous for it's Ekka (you can read all about it HERE).  As the Nursing Home residents are unable to attend the real Ekka, they have their own!!  Our table looked so lovely - very bright and pretty.  We sold lots of things and had a wonderful day.  My friends from my craft group helped out by making items for the sales table which was great - our table was groaning with goodies!


Last night I made another Chalkboard Roll - I'm getting better with each one.  I like to mitre the corners and the last couple I made were okay but not perfect.  I found a great tutorial HERE which shows how you trim off a triangle at the corner, then fold over to form the mitred corner - it worked so well.....


I did have a problem with the tension when I made this one and I have since read up on working with Chalkboard fabric.  I think I should have used a 90/14 needle.  I already use my walking foot.  I sewed this one on my smaller sewing machine (Brother Compal Sovereign)  but I had used my big machine (Brother Nouvelle 1500) when I made the previous rolls and I didn't have the tension issues with those (I have this machine set up for all of my quilting).

I'm a bit behind with my Civil War blocks (you can see the latest in my Flickr site & on my Civil War Blocks Page) so perhaps I will get some sewing time in today and try to catch up!  again!!

I also have my Royal Critters quilt ready to do the quilting on so I might even set up my machine and get started on that too!!!

Happy Sewing!!


Wednesday, 15 June 2011

ELEPHANTS, OWLS AND MONKEYS!

Royal Critters - with borders!

I took a close-up so you can see the fabrics better!

Today, after some serious vacuuming of the stairwell and surrounds (I know - more cleaning!!) I managed to get the borders on my Royal Critters quilt.  I wanted to follow the pattern and use the Elephant fabric for top and bottom and the Monkey fabric for the sides, but on closer inspection and after trying to make a first cut, I discovered that the Monkey fabric was printed with the pattern running lengthwise (I only had 30cm) and when I looked more closely at the Pattern photo, it had the Monkey fabric joined so the Monkeys were up the right way!  I wasn't up for that plus to my dismay, all the special fabrics I had purchased in this range (Owl, Elephant and Monkey) were printed askew!!!  I used the Elephant fabric for top and bottom borders, but it was extremely difficult to keep those Elephants walking in a straight line!!!   I went for the Owl fabric for the side borders and it was a little better and then fussy-cut the Monkey fabric for the cornerstones.  If I had tried to use the Monkey fabric they were also printed askew and there was no way they would have lined up for my borders!!  Very disappointing when I think of the price I paid for this fabric!!!

Oh well, it's done now!!  Tomorrow I will hopefully get the backing cut and pieced, then get it all ready for quilting.

Happy Sewing!!

Monday, 13 June 2011

Chickens & Critters

This is the little bundle that is going to a little one very soon!
A cloth book and the Chubby Chicks quilt is for
the birthday girl and the chalkboard roll
is for her big sister.

Chalkboard roll
for the big sister!

The chalkboard roll is super easy to make.  I found the pattern in SIMPLE QUILTS AND SEWING #119    2011     It was designed by Susan Huberty, tazetta.com.   I think these are a great idea!

There has been a slight delay in delivering this parcel, so I won't show you the label and back of quilt just yet:-)

It's a long weekend here, thanks to the Queens Birthday holiday, so I've been enjoying some lovely sewing time.  I now have all the sashing on the Royal Critters quilt.....
Royal Critters - with sashing (not very well ironed!)

They do look cute!

so now I have to cut the final borders and binding and backing - won't be too long and this one will be added to the Finished list!!

Another item I have made this weekend.... a Market Bag for my friend's Mother...
My friend's Mum likes flowers - I hope
she likes these.
I love making these bags!!
Pattern by artsy-crafty babe


I plan to sew the latest Civil War block on my Singer 201K - I'm just threading it up now and reading the book!
 

Happy Sewing!!

Thursday, 9 June 2011

Here Chicky Chicky, Here Chicky Chicky

CHUBBY CHICKS!  QUILTED AND BOUND!
and YES, I have put a label on the back,
but I can't show you just yet......
after tomorrow!

Yes folks!!  I actually have a QUILT FINISHED for 2011!!!!!

Yes, I know!   a long time coming:-)   I completed the binding yesterday - all done on my machine using THIS method.  If you have followed my blog for some time, you will know that I absolutely L.O.V.E. this method.  It makes for a very child friendly and mummy friendly quilt too - goes in the wash with no problems and no fear of the binding coming adrift!  Actually, I washed and tumble dried this quilt today - as I use cotton wadding, it was dry in no time!  I added a colour catcher in the wash just in case, but there was no colour run so that's good!  I like to wash my applique quilts before I hand them over, just to make sure my stitching stays where it is supposed to - plus on this one I had used a dark blue thread for the little chickee legs and I was worried that it would "blurr" but it's all good!!!

MH is delivering this one tomorrow so then I can show you the label!

So now what?   Well, as I type I have the Royal Critters quilt on the sewing table - putting the sashing strips on tonight so who knows????  yet another 2011 finish might be on the horizon!!!

Happy Sewing!! 

Friday, 20 May 2011

CATCHING UP!

Yes, I know...... I've been absent!

Hmmmm.... I don't even have a note from my Mother or Doctor or ANYBODY!!

If I did have a note, it would read like this.....

Dear Followers of Aunty Hennys Blog,

Sorry, Aunty Henny can't hand in her homework.  No, the dog did not eat it, but she has been unwell with a cold and very busy on the home front with her teenage son who seems to go to every School Formal and Ball around!!  Aunty Henny has been sewing, and will provide photographic proof shortly.  Also, it appears that some type of storm has hit her sewing room, as it is indeed in a dreadful mess and she can't find a darn thing!!  Normal reporting of all things patchwork and quilting and sewing will resume very shortly!


Okay, stop handing out the tissues!  I'm over the cold (gave it to MH) and once the next School Ball is over (this Saturday) I'm going to try and get in and do some serious sewing!

Just to catch you up with a few items......

1.  HOT PAD SWAP with Cheryll at Gone Stitchin' .. I received a lovely parcel from Pauline from Northallerton, North Yorkshire, England .... Thank You Pauline, the Hot Pad is in use daily!!
Hot Pad from Pauline

I sent my Hot Pad over to Angie at Five Little Monkeys Quilting blog but sadly, I forgot to take a photo!!  I've emailed Angie asking if she can send me one!

2.  ROYAL CRITTERS QUILT ..  I've had the pieced blocks made for some time and now need to get the sashing and cornerstones on - so soon you will see a completed quilt top!!
Pieced blocks - Royal Critters
Royal Critters applique, all done!

Quilted Basket Swap


3.  QUILTED BASKET SWAP - Quilting Gallery , pattern by Geta   I have sent my Quilted Basket to my secret swap partner (well, I know who she is, but I can't tell you just yet!!)  Here is one picture and if you would like to see more, just click on my Flickr Site.  I included a pincushion, needlecase and notebook folder with the basket.  This was a fun swap and the pattern by Geta is great!!

4.  SIGGY BLOCKS - I have received a few siggies lately, will get them photographed and up on my blog soon!

So, there you have it.... a catch up with what's happening in my world!  I'll be back soon with more photos!  I do hope to get back onto quilting the Chubby Chicks quilt soon!

Happy Sewing!!

Thursday, 17 March 2011

AND HERE'S THE REST OF THE FAMILY......


The Owl, Bee and Elephant.  Still missing some details, but ready for
me to start stitching!!

HOW TO BUILD A MONKEY

"What did she say?"  I can hear all of you laughing!!!

Today I built a Monkey.......   Applique block that is!!  This is the method I use when "building" a layered applique, such as the Monkey.


1.  Trace applique shapes onto iron-on webbing, cut out roughly then iron onto chosen fabrics.

2.  Cut out each shape.

3.  Place applique paper design under your Applique Mat.  You should
do this on your ironing board.  An applique mat is a teflon
sheet, you should be able to buy them at all
craft shops.

4.  Peel all paper backings from applique shapes, then begin
to place each shape from the bottom layer upwards.  Do not iron yet!

5.  Continue to build your shape, placing all the pieces where
you want them, making sure you have put the "under" pieces correctly.
In this case, the ears under the forehead, the eyes under the face, and the forehead under the face.

6.  Now you can begin to press.  If you are worried about having
the pieces "right way up" you can fold over your Applique Mat on top
of your fabric making sure you don't disturb the layout.  Just
press until you feel every piece is set.

7.  Now you can see that your applique Monkey is all ironed up ready
to place onto your background fabric.  Don't peel him off
immediately.... let him cool off a bit!

8.  O.K., he's cool now, so peel him off gently and this is what you get,
a one piece applique unit.

9.  See, he's all ironed up ready to go!

10.  Position your applique unit onto your background fabric and press.  I like
to dry iron the front but steam iron the back, it seems to help set
the glue of the fusible web.
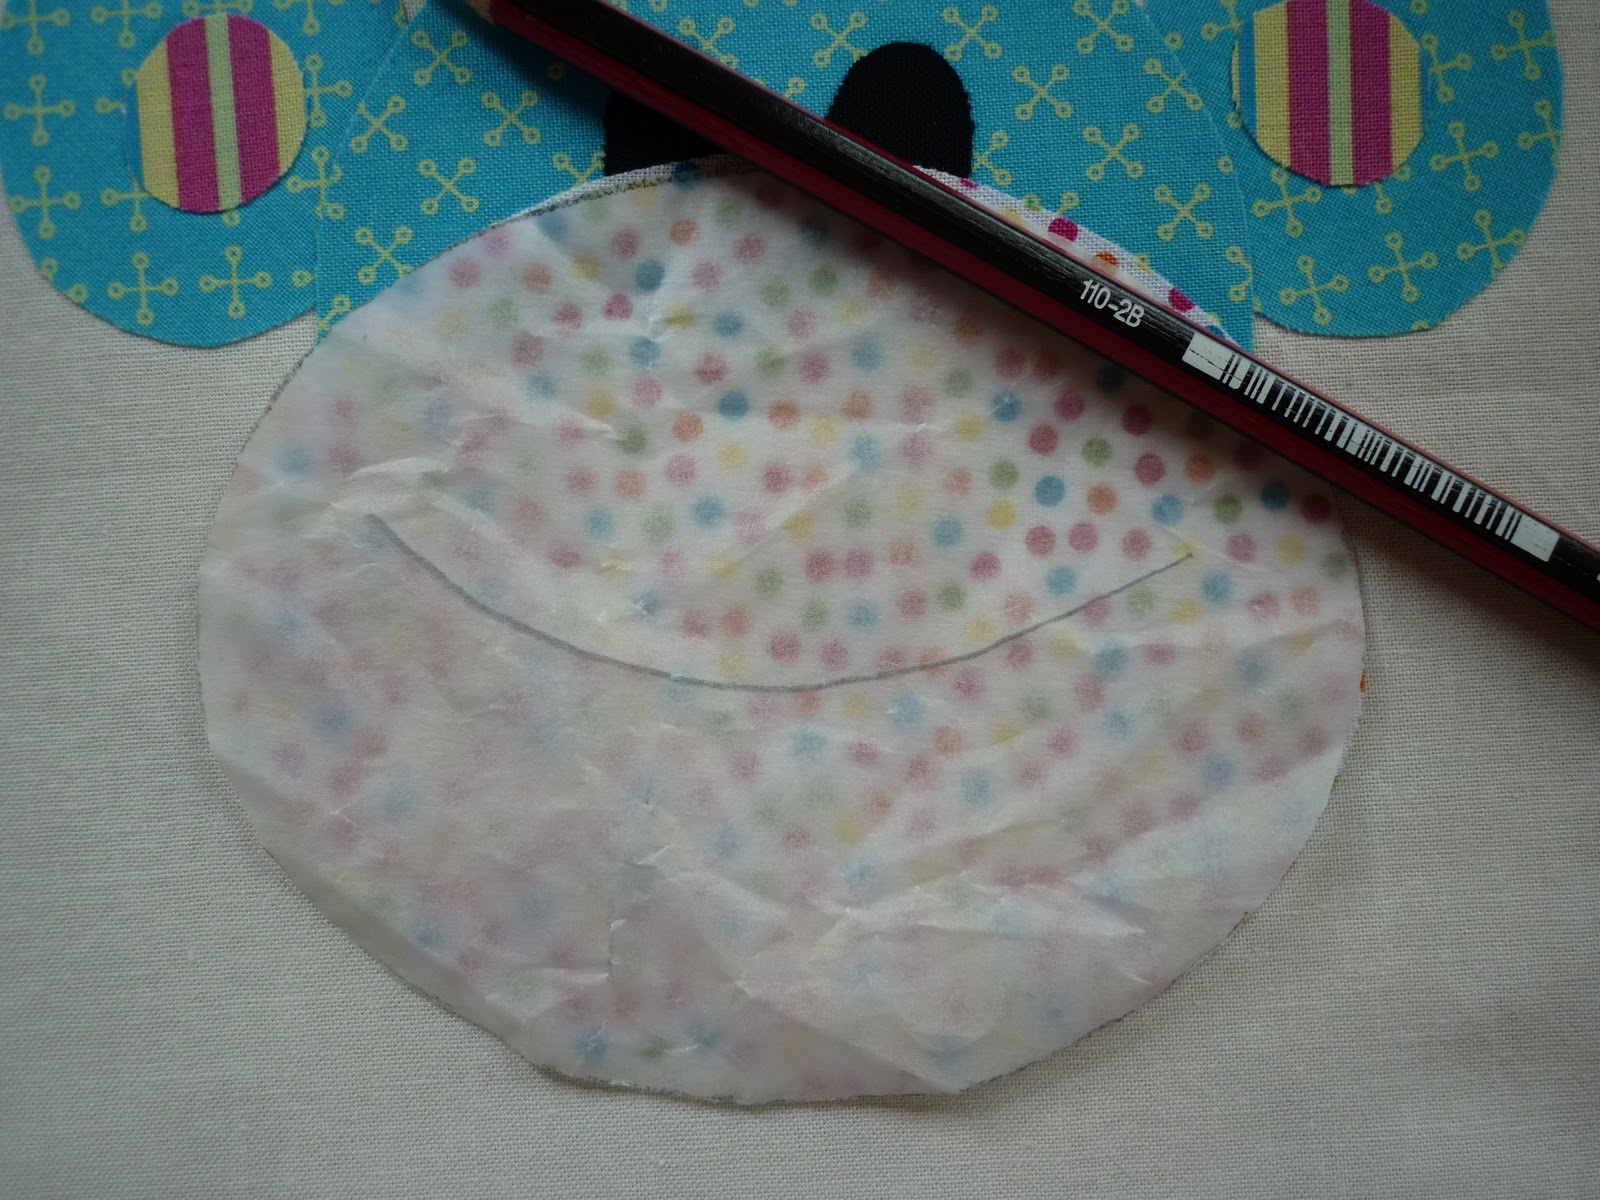
Now, how to trace his mouth.  I actually have a light board, but as many of you
do not, this is the old "penny rub" method.  Just trace the mouth onto
the piece of paper which came off your face applique, then flip over
and rub that tracing onto your fabric.

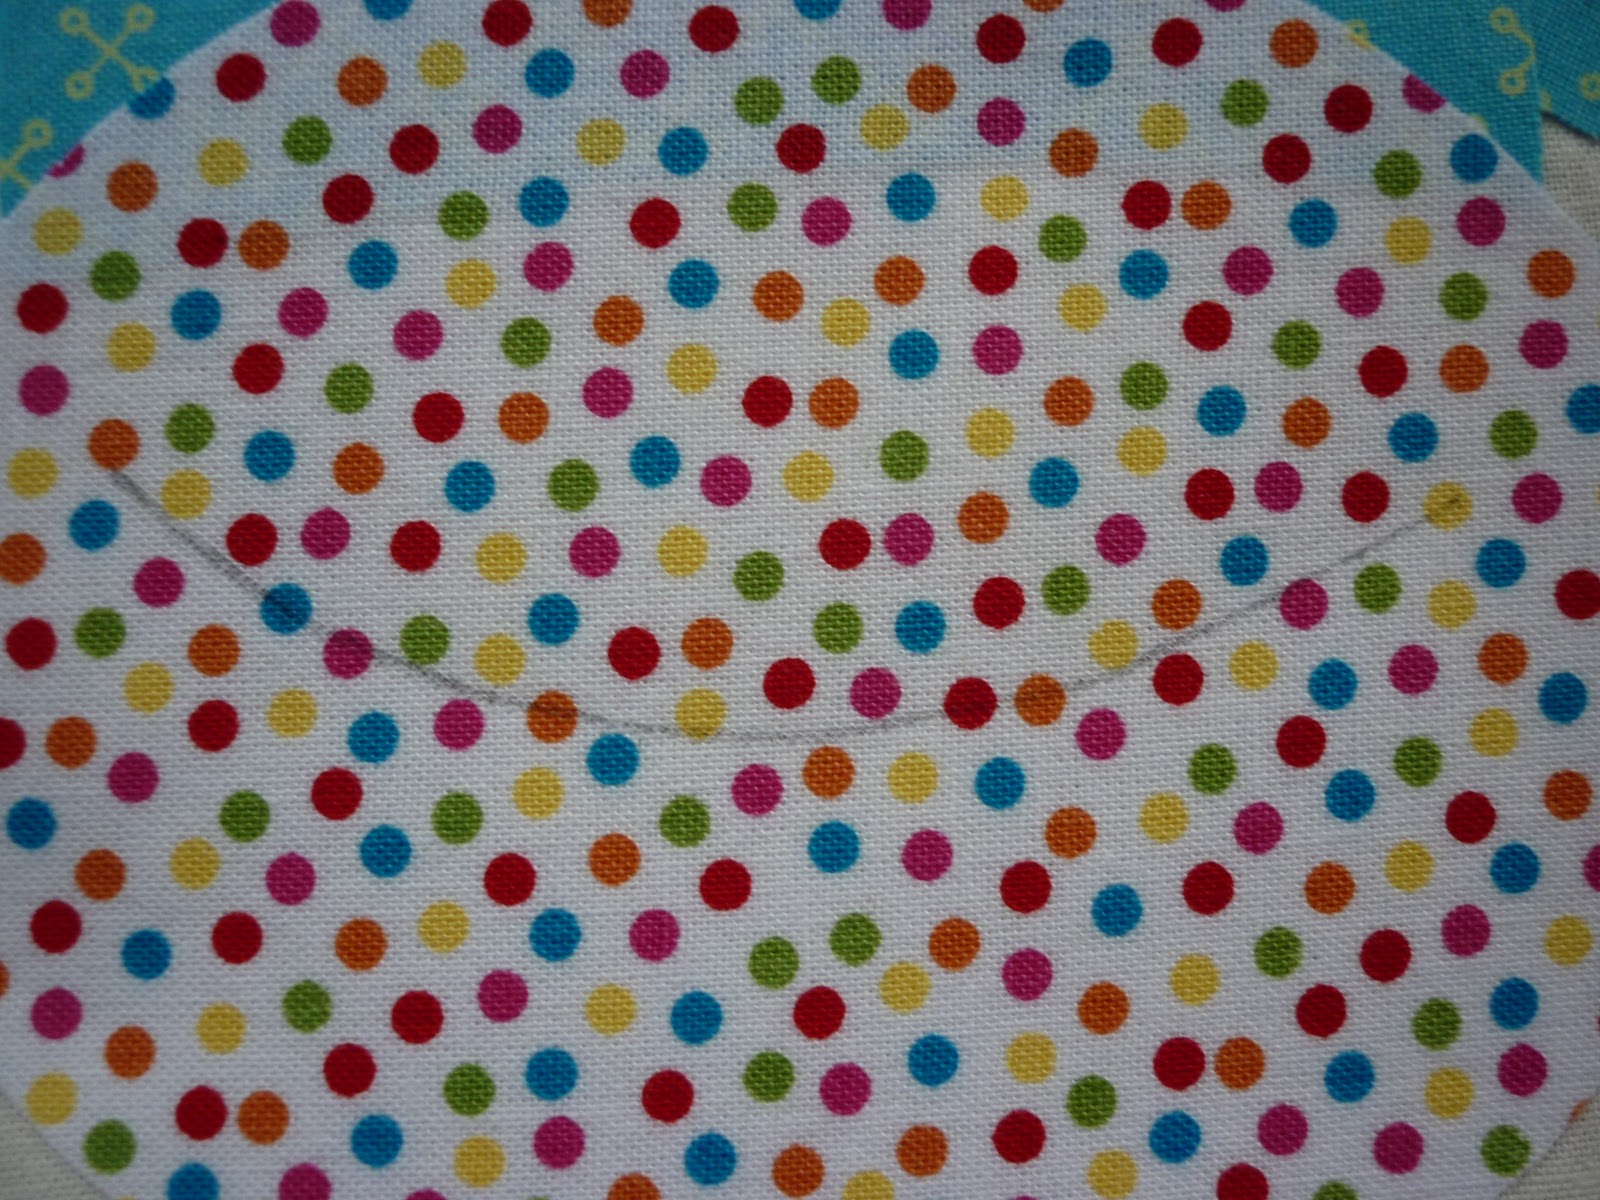
11.  You can see it fine, and can always go over it
again with either a 2B pencil or your Pigma Pen.

12.  So now I have the Monkey all ready to blanket stitch.
Next on the list is the Elephant, Owl and Bee.

You didn't know you were going to have an Applique class today, did you!!  Hope you enjoyed it!!

Happy Sewing!!


sorry, I should have mentioned that the pattern I am working with is "ROYAL CRITTERS" - it's a free download!

Wednesday, 16 March 2011

LONDON SQUARE

Block  # 11  ..  Civil War Quilt
LONDON SQUARE
This block was an easy one to do....  came out right size, no problems piecing it at all ---  I really like this block!  I used the Wonder-Cut ruler to make the HST's.  Too easy!  So, do I have any tricks or tips???

Now, really... what do you think?

MY TIPS AND TRICKS FOR THIS BLOCK....

Not a lot to say but....

Make sure you set out all the pieces before beginning to stitch.  Check out Lillians blog and American Homesteads blog... great step by step pictures!   I had to unsew some of my triangles :-(    It's a bit like putting on mascara... you need to hold your mouth right!!  I lay everything out and THOUGHT I had everything in the right spot, but when I did the sewing, my triangles were facing the wrong way!!

Press each segment lightly.   Trim the ears from each set as you sew.  To attach the final large triangles, just press your centre pieced triangle row in half, then press each triangle in half.  Match up the half way marks, pin and sew.  You should have little ears at each end.  Your pieced block will be 8  1/2" square.  Trim those final little ears and your block is done!  I spray starched and pressed the completed block.

So, what else have I been up to???

I have made a couple of the Market Bags and another List-taker.

Tomorrow I will be building the applique blocks for the Royal Critters quilt. 

Happy Sewing!!

Sunday, 20 February 2011

.... AND THIS BLOCK WAS "JUST RIGHT"!!

BLOCK # 8 - CIVIL WAR QUILT......This was a nice easy block.  At first, I just used a 4  1/2" square of the dark fabric with  3" corner squares to form the snowballs, but this resulted in my  X  being a little narrow.....   there are 4 squares to each block.
First try..    I like my fabric choices, but
my  X  is too narrow
(compared with the pattern)
I loved the blocks in the flickr group that
used striped fabric.  As I am working
with 10" squares, I didn't have enough
of any one fabric so I used two different
colourways in the same stripe, but
it was impossible to cut matching squares,
so my stripes don't match.
X  is still too narrow.


Success third time around!  I like the proportions of this
block.  I downloaded the template which was made with EQ6 and then
I just did the measurements from that.
This block used a  4  1/2" square with  2  1/2" squares for the corners
to form the snowballs - there are 4 squares to the block.

I really enjoyed making this block.  

MY HINTS AND TIPS FOR THIS ONE???

Well, I did find that precise pinning was a key point - I used my fork pins to match up all of the seams.  

I used a "scant" 1/4" seam allowance.

I did not use any steam in my iron until the very last press.

I tried pressing my seams open in the construction stages for blocks 1 and 2, but found that pressing to one side resulted in a better fit by the time I made the 3rd block.  I did press the final centre seam open.

All of my blocks came out the correct size....  8  1/2" pieced for an 8" finish.


It's been a very, very HOT AND HUMID AND STICKY couple of days here in Brisbane.... I'm surprised that I did any sewing at all!!!  It's kind of difficult keeping all the fabric where it belongs with the FAN on FULL BLAST!!  Still, it was cooler in my sewing room than other rooms in my house!

Hopefully I will get out to my LQS and buy some fabric to start on the ROYAL CRITTERS quilt - I am almost finished all of the embroidery on my Keep Movin' quilt so I will need a new hand sewing project soon!

Happy Sewing!!