
Today I built a Monkey....... Applique block that is!! This is the method I use when "building" a layered applique, such as the Monkey.
 |
| 1. Trace applique shapes onto iron-on webbing, cut out roughly then iron onto chosen fabrics. |
 |
| 2. Cut out each shape. |
 |
| 3. Place applique paper design under your Applique Mat. You should do this on your ironing board. An applique mat is a teflon sheet, you should be able to buy them at all craft shops. |
 |
| 4. Peel all paper backings from applique shapes, then begin to place each shape from the bottom layer upwards. Do not iron yet! |
 |
| 5. Continue to build your shape, placing all the pieces where you want them, making sure you have put the "under" pieces correctly. In this case, the ears under the forehead, the eyes under the face, and the forehead under the face. |
 |
| 6. Now you can begin to press. If you are worried about having the pieces "right way up" you can fold over your Applique Mat on top of your fabric making sure you don't disturb the layout. Just press until you feel every piece is set. |
 |
| 7. Now you can see that your applique Monkey is all ironed up ready to place onto your background fabric. Don't peel him off immediately.... let him cool off a bit! |
 |
| 8. O.K., he's cool now, so peel him off gently and this is what you get, a one piece applique unit. |
 |
| 9. See, he's all ironed up ready to go! |
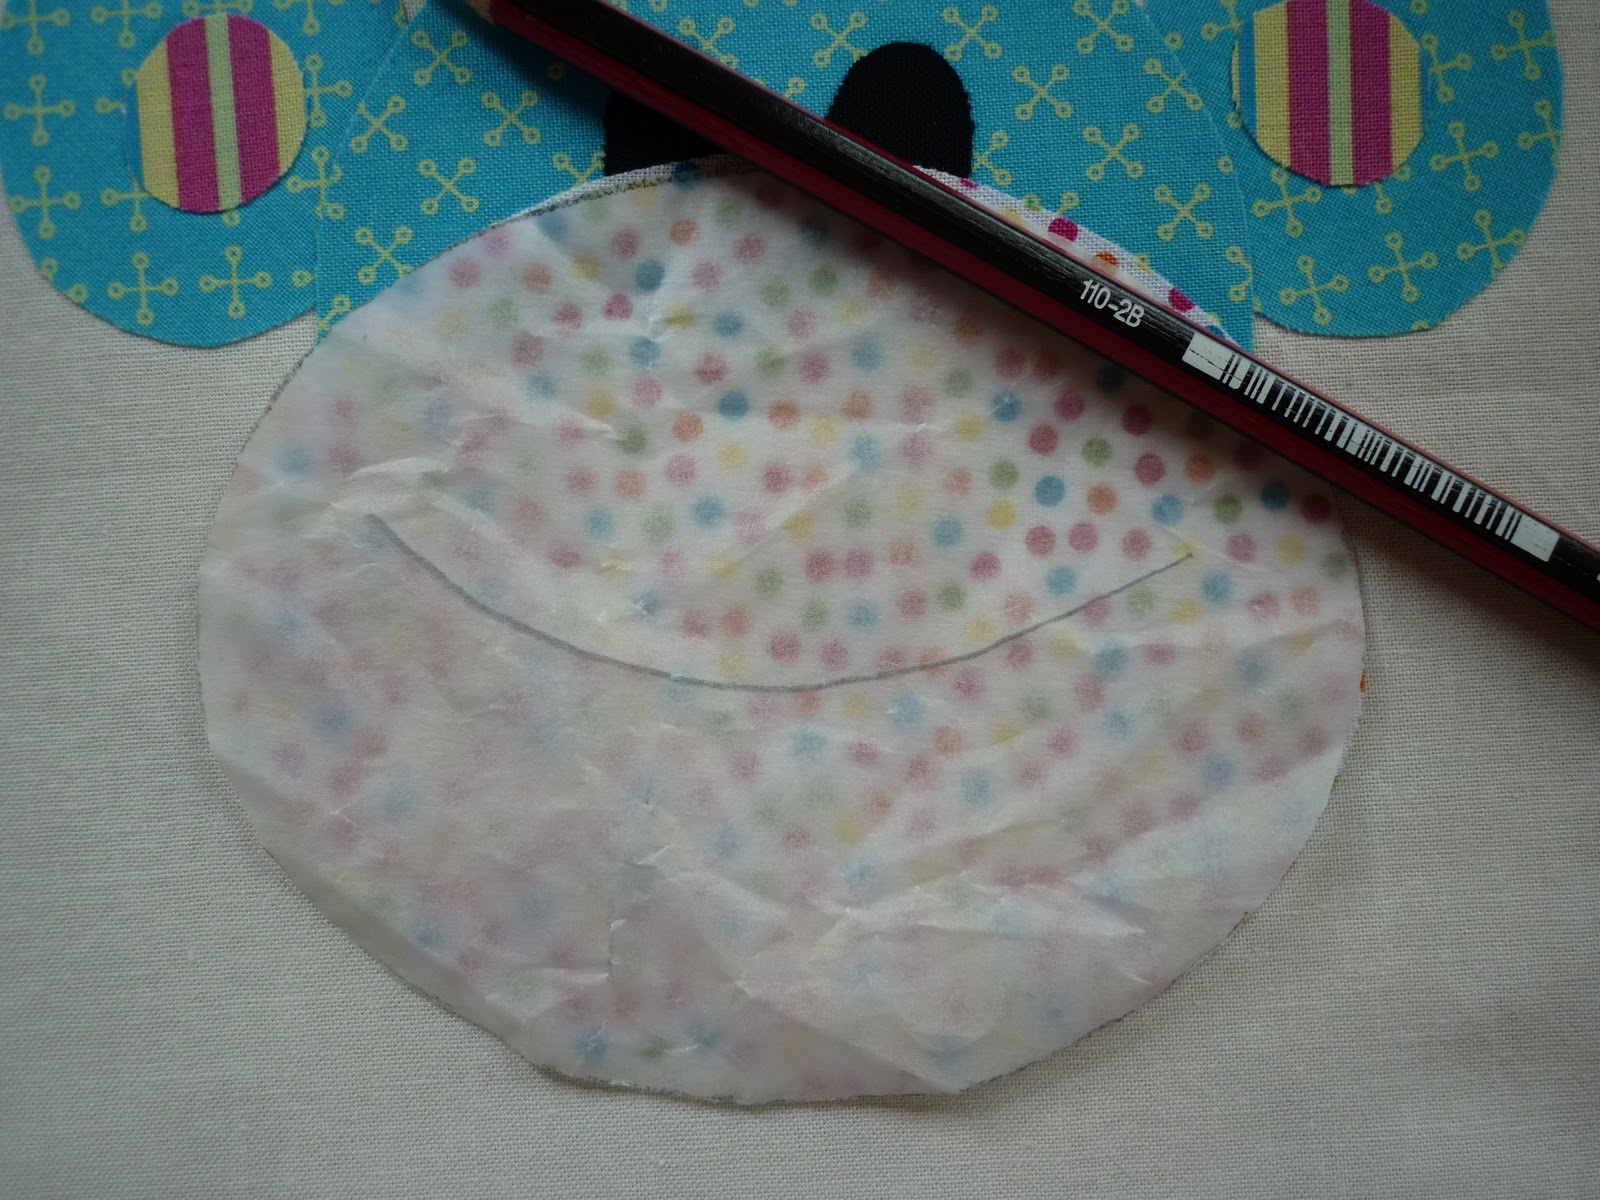 |
| 10. Position your applique unit onto your background fabric and press. I like to dry iron the front but steam iron the back, it seems to help set the glue of the fusible web. Now, how to trace his mouth. I actually have a light board, but as many of you do not, this is the old "penny rub" method. Just trace the mouth onto the piece of paper which came off your face applique, then flip over and rub that tracing onto your fabric. |
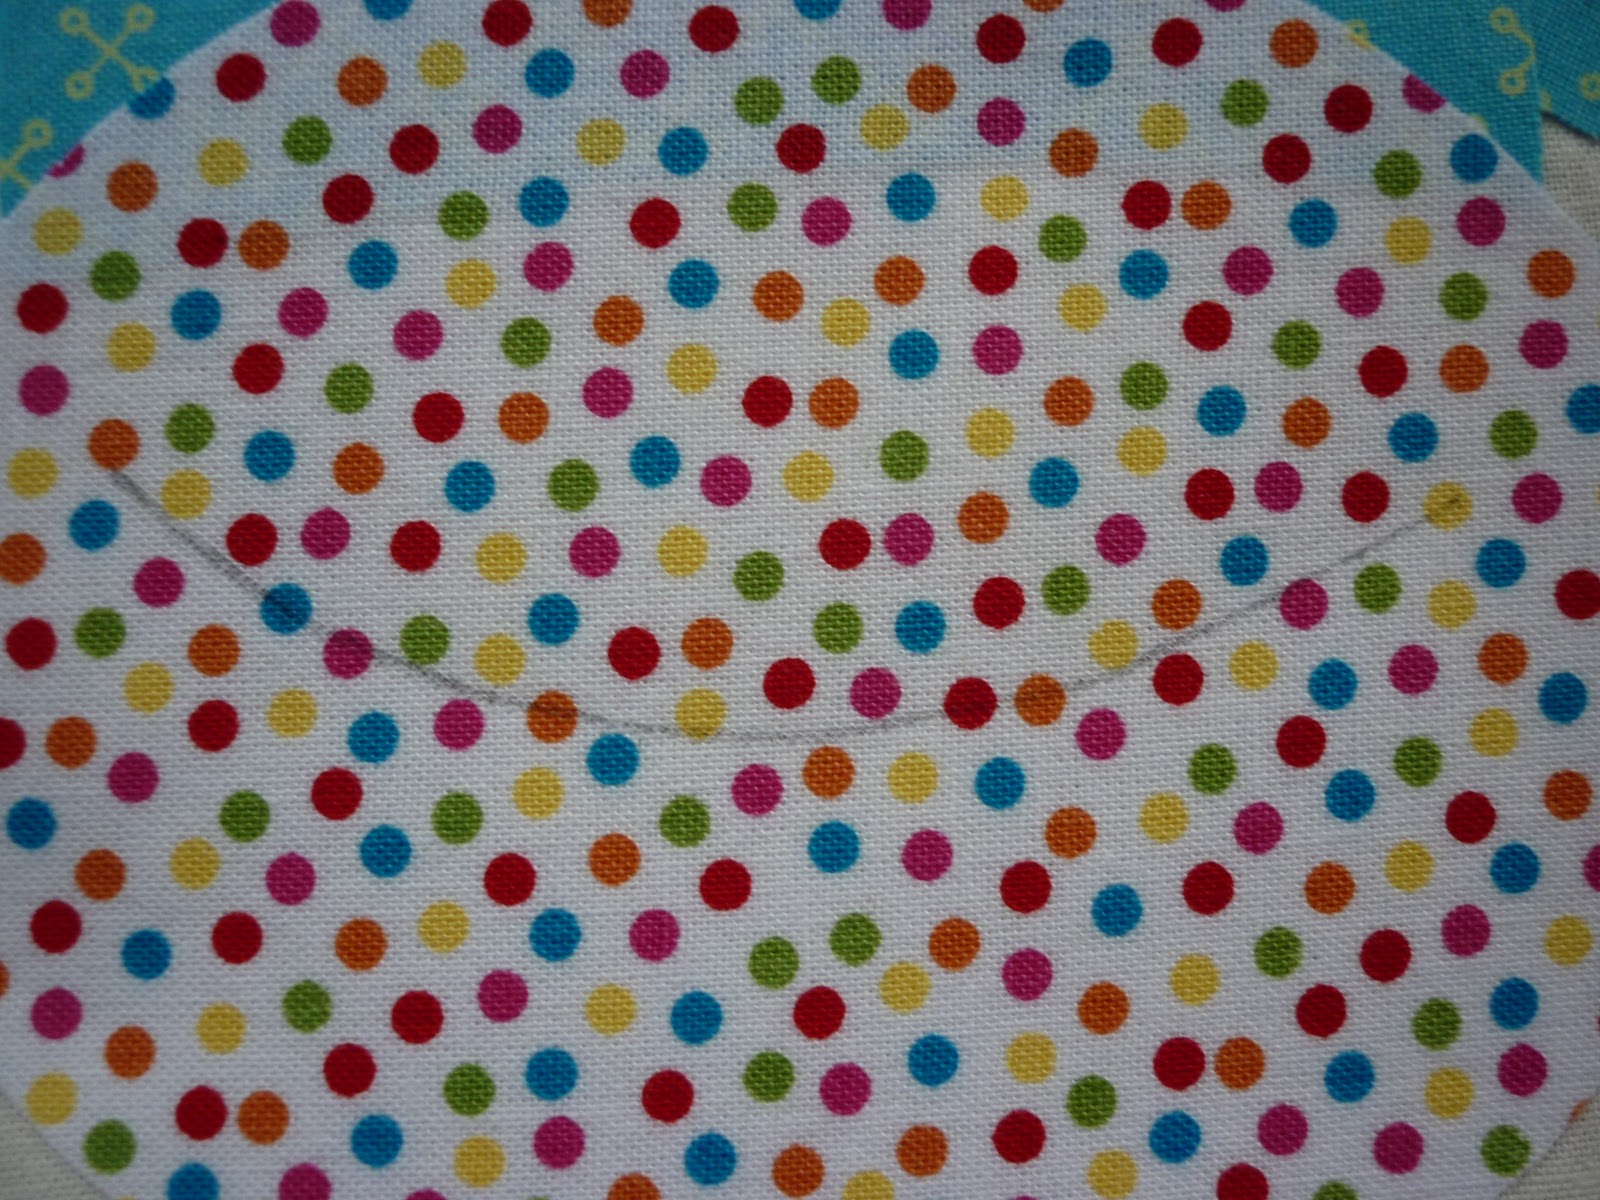 |
| 11. You can see it fine, and can always go over it again with either a 2B pencil or your Pigma Pen. |
 |
| 12. So now I have the Monkey all ready to blanket stitch. Next on the list is the Elephant, Owl and Bee. |
You didn't know you were going to have an Applique class today, did you!! Hope you enjoyed it!!
Happy Sewing!!
sorry, I should have mentioned that the pattern I am working with is "ROYAL CRITTERS" - it's a free download!
sorry, I should have mentioned that the pattern I am working with is "ROYAL CRITTERS" - it's a free download!


Helen,your monkey is adorable, which pattern is this?? I love it!
ReplyDeleteMandy
What a fantastic nmonkey - we all love him!
ReplyDeleteI DID enjoy that . Your monkey is so cute I want to make one right now!
ReplyDeleteCant wait to see the other critters!
Thanks for the tutorial Helen, very cute! And the link to the pattern...the owl looks great too!
ReplyDeleteThat is adorable and thanks for the tutorial!
ReplyDeleteThat was a wonderful applique class. I had never heard of steaming the back of the applique. That's a good tip.
ReplyDeleteLillian
Love ya monkey! Can he come out to play?
ReplyDeleteOh, this is too cute!! I just love it.
ReplyDeleteThis looks so cute. Love that Monkey! Love how you made him.
ReplyDeleteThat is a very cute monkey. Thank you for the tutorial. I didn't know applique mats existed!
ReplyDelete