I love to sew, mainly quilts and bags. I am 66, married to Fred and have one son, Matthew, who is 27. I enjoy embroidery and applique and prefer to machine piece and quilt my projects. I love my vintage Singer sewing machines especially my Featherweight 222K. I’m enjoying treadling on my 201K Singer and I collect Miniature Sewing Machines and currently have three Essex , one Singer 20, one Singer 40, two Vulcan Miniatures and my latest, a Grain. My love of sewing I believe comes from my Grandmother - I still have the drawings she made for me to embroider on tea towels many many years ago!
Showing posts with label Featherweight sewing. Show all posts

Sunday, 1 October 2017

COSY UP

MICROWAVE BOWL COSY

Hello!

A little Christmas sewing happening over the weekend, I'm making Microwave Bowl Cosies.

and I just love how quickly it goes together.

I'm making the rounded version as I like the look of it better than the square version.

CIRCULAR STITCHER

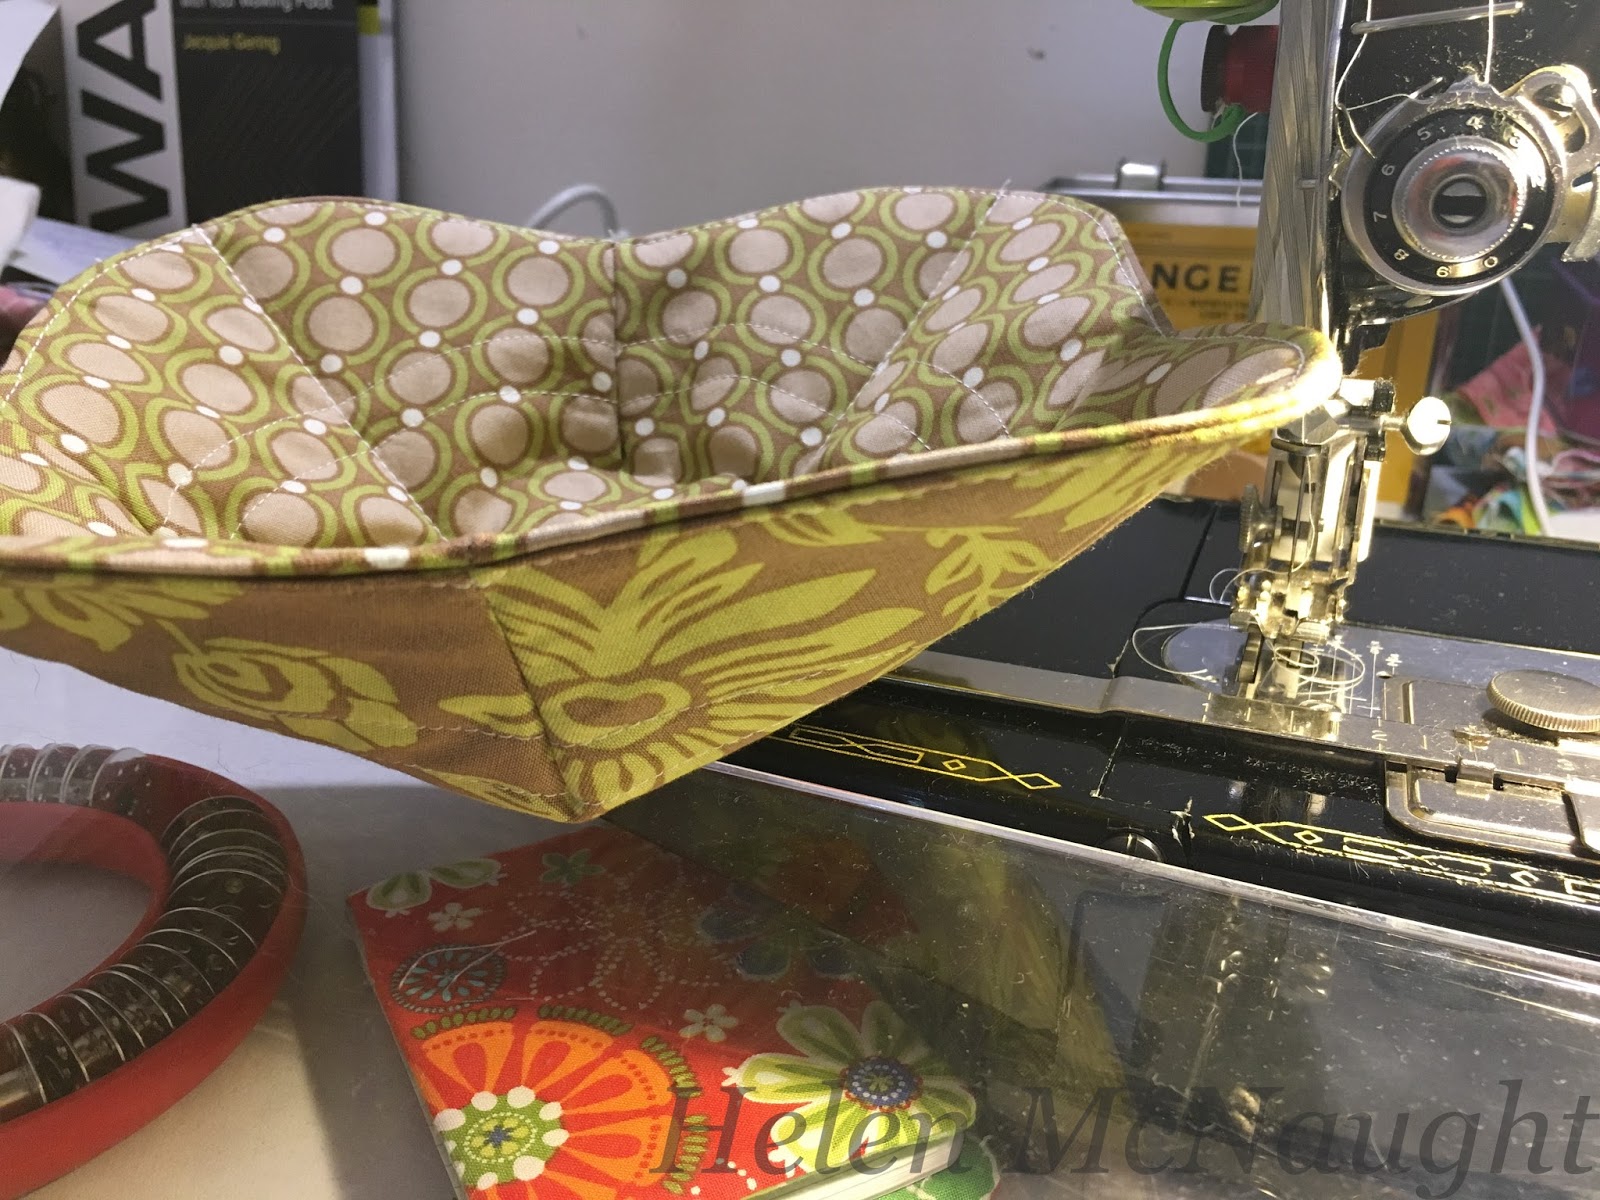
After I cut out the beginning squares (prior to cutting down to size) I do a couple of rounds of quilting on each half (each half is made up of one square of fabric paired with one piece of cotton wadding) - I'm using the Circular Stitcher on my 222k Featherweight to do this...... love that gadget!!  I do two rounds of quilting, that's enough for this project.  It will get more at the end.

As I'm using a purchased pattern I won't go into great detail as to the pattern and methods used but I can share my tips and tricks 😃

To make the bowl shape you do four pleats.  I like to use a very small stitch length for this.  I cut my rounded edges using the pattern and my rotary cutter  (after cutting the pleats) - nice smooth rounded edges.

I use my walking foot for the construction, it helps to keep it all together nicely - my seam allowance ends up being just a smidgen over 1/4".  Trim the seam allowance to 1/8" after stitching the pleats.  Do the same for the seam allowance after stitching each half of the Bowl Cosy together.   The only bit I leave at full seam allowance is where I have left the turn through opening - I also stitch off at each end of the turn through opening.

Here is a similar method to how I sew the turn through opening...  http://keyka.typepad.com/my_weblog/2008/11/how-to-slip-stitch-a-seam-closed.html.

The only thing I add is that I stitch off to the outside edge at each end of the opening.  This keeps the 1/4" seam allowance in place when I turn the cosy right sides out.  The "opening" will press nice and flat and if I'm using a 1/8" seam allowance to top stitch then the opening will get closed with that topstitching.


So my turn through opening is in between the blue lines.  I stitch out on those two lines using a very small stitch length and I stitch between the two lines using a long stitch length.  Once I press the seams back after stitching, I remove those long stitches.

Once I turn it all right sides out I find giving the rounded "corners" a good press helps to set it in place ready for the final topstitching.  I topstitch using a little longer stitch length than I use for piecing.  I like to do the topstitching about 1/8" from edge.  The turn through opening will be closed with the top stitching.

The last bit of stitching is to quilt on the diagonal both ways from the centre of the curved corners.

You can see the diagonal quilting 

These are fun to sew.  I think the best way to do a bunch of these would be to prep a whole lot of them and then chain stitch.  I'm setting up two machines ... the 222K for the circular stitching and my Brother PQ1500 to do the rest of the stitching.  

Happy Sewing!!
Cheers from Helen


Sunday, 24 September 2017

I BUILT A CHICKEN


I'm still working my way through the book Farm Girl Vintage (Lori Holt- Bee in my Bonnet).  Here's my Mama Hen block 🙂. Next up is page 45 Milking Day block.  


Happy Sewing!
Cheers from Helen

Friday, 30 December 2016

I'M A FARMGIRL

Hello!

I received the book Farm Girl Vintage from my lovely friend Erica for my birthday this year.  I have been collecting fabrics and this week I have started making the blocks.


Block # 1 -  Apron Strings

I thought I had made this block incorrectly but when I looked at other blocks on Facebook I found they all looked like mine!  in the book the block looks a little different and I have figured out why.  I will make another one of these and see how that one comes out.

I found the perfect box to hold my blocks

A cute little kookaburra box to house my completed blocks.

My 222k is perfect for these little pieces

Block # 2 - Autumn Star


Block # 3 Baby Chick

I love this block - I did the Chick's legs on my cute little Essex miniature sewing machine.  It only does chain stitch so I traced the legs on the back of my patchwork block and stitched on the lines.  The chain stitch is then on the front of my block.  This is the first time I have tried this method and I'm pretty happy with the results.  Bit loopy here and there but I think it adds to the charm of the block.


Essex Miniature Sewing Machine


Holly from next door is helping me

I'm looking after Holly at the moment and this is the first time in all these years that she has come into my sewing room.  I think she's lonely plus there has been a lovely breeze coming through the door.  The overhead fan is also on!


My friends will have a laugh at this one...... Baking Day !   never happens in my kitchen!!!


Block # 4 Baking Day


I'm thoroughly enjoying the process making these blocks.  Yes they are small pieces (some teeny tiny ones) but I like to challenge myself with different techniques and methods.  I'm not rushing this project, I have all year if I want to take that long!


Block # 5 Butter Churn
Christmas was very pleasant.  We had a cool day for a change (it's usually scorching hot and humid) with some rain showers.  Lovely!  I'm now the proud owner of a Dyson Stick Vacuum cleaner...... and I'm not afraid to use it :-)    It's a great little cleaner - perfect for our home and lifestyle!  Some would say that it's not an exciting Christmas gift......  well I think it's perfect!  I needed a lighter vacuum cleaner and this one is just right! it's very powerful too!


I've had a pleasant few days in my sewing room this week and apart from the Farm Girl blocks I have also made another Majestic Mountain block....
Majestic mountain block - made with recycled cotton shirts

I really must get this one done ! - By Air, By Rail, By Sea.
I'm up to the By Air row
Machine blanket stitch on my Brother Quilters Edition

I did a bit more on the By Air, By Rail, By Sea quilt - two clouds to be exact!   I'm making this one for my brother to gift to his grandson (my great-nephew Amos)  .... I really must get a move on!  I've been making this for over a year now!
Pavlova!  what more can I say? :-)
My sister makes the best desserts!

Cheers from Helen


Thursday, 7 January 2016

NEW YEAR ... ANOTHER LIST OF THINGS TO DO....

Happy New Year
to 
everyone!

I had a bad start to 2016.......  was struck down with a tummy bug the day before New Year's Eve and didn't fully recover for a few days after ... but all good now !  not the start to the New Year I had planned.

Although I have said this before...... I will endeavour to post more to my Blog this year...... yes really! I will!  and to that end I have committed to a quilt along over here   (Whimsical Fabric Blog).  This sounds like a fun project - you make one block per month using scraps from a current project and by the end of the year you will have a quilt showcasing all the fabrics you have sewn with during the year.

I have been sewing for the past few days - I have my Civil War quilt all joined up to a flimsy but I'm waiting on two fabrics that might be borders..... I'm trying to grow the top out to fit our King bed.

Here are the rows just clinging on to my design wall a few days ago but they are all joined up now - I discovered I was missing a row....... found it!!!   so my top is 6 blocks across and 7 blocks down.

So my first block in the quilt along will be made with Civil War scraps - even though this quilt was pieced back in  2011  ...   as a finish for early 2016 I think it counts :-)


I have also "almost" finished my Table Runner from the quilt along I participated in last year.... Scrap Dance Quilt Along.  I decided to use up the seemingly never ending pile of "sewing" themed fabrics I had in my stash.  Here is the top pieced ...

I have since added a final border of scrappy squares and I pieced up a backing for it too but no photo yet!  I think the plan for the table topper size was a square table centre but I wanted a runner to go over my vintage treadle cabinet.  I should have made one more block to even out the pattern but I'm happy with how it looks.

So another WhimsicalFabric January block will be made using the leftover fabrics from the Table Runner - thankfully there aren't too many of those! but enough for one 9 patch block :-)

Brisbane has had some lovely cool rainy days for about two weeks but today we are back to warm and humid.  Sewing is probably the last thing to do on such a day but I'm just about to head in to my sewing room and set up my Featherweight to do the quilting on the table runner.  My 222K does lovely free motion quilting and this runner is just the right size project for this machine.  I would not attempt anything too large on my Featherweight as it is only a small machine with a small motor.

My sewing list for January.....

Finish Civil War quilt

Finish Scrap Dance table runner

Complete the embroidery blocks and make the four patch blocks for the Farm Quilt I'm currently working on... this one is a gift for our neighbour's little granddaughter.  Her birthday is sometime in January.

Start another "Boats on the Open Sea" quilt.... this one will be for my ODIBAG stash   (one day I'll be a grandmother).   This quilt will be my hand sewing project for quite a while :-)

Find a backing for my Teddy Quilt (another one for my ODIBAG stash).


Happy Sewing !
Cheers from Helen


I

Wednesday, 9 December 2015

A little hand sewing

Hello!

Checking in on this warm Wednesday. Enjoying a yummy Vietnamese coffee and catching up on my hand sewing. 


Yes ANOTHER farm quilt !  Making this one without the fusible PELLON on the back - not sure I like stitching without it. 

I've been working on a Teddy Quilt for my ODIBAG (one day I'll be a grandmother) stash ....


Up to the borders.  Sewing this one on my Featherweight 222K - and loving it :-)

Heading in to Town later for my skin cancer check up and then home for more sewing!

Cheers!
Helen


Sunday, 22 November 2015

A NURSERY RHYME QUILT

Hello!

Brisbane has suffered terribly hot weather these past couple of days so I spent most of the time in my sewing room, under the fan!

Our neighbours had a new baby boy October 1st so I'm making a little quilt for him.  I made his big brother the Farm Quilt  (click to link)  last year.  If you click on the Label below this post ..Mini Farm Quilt, you will see that quilt and other Farm quilts I have made. Click on Farm Quilt and you will see the full size quilt.

I purchased some lovely fabrics when I was away on my 60th Birthday girls weekend.  The fabrics are by Vita Mechachonis called Nursery Rhymes.

Sewing on my Featherweight 222K


My new Horn cutting/pinning table.  This is it folded up.

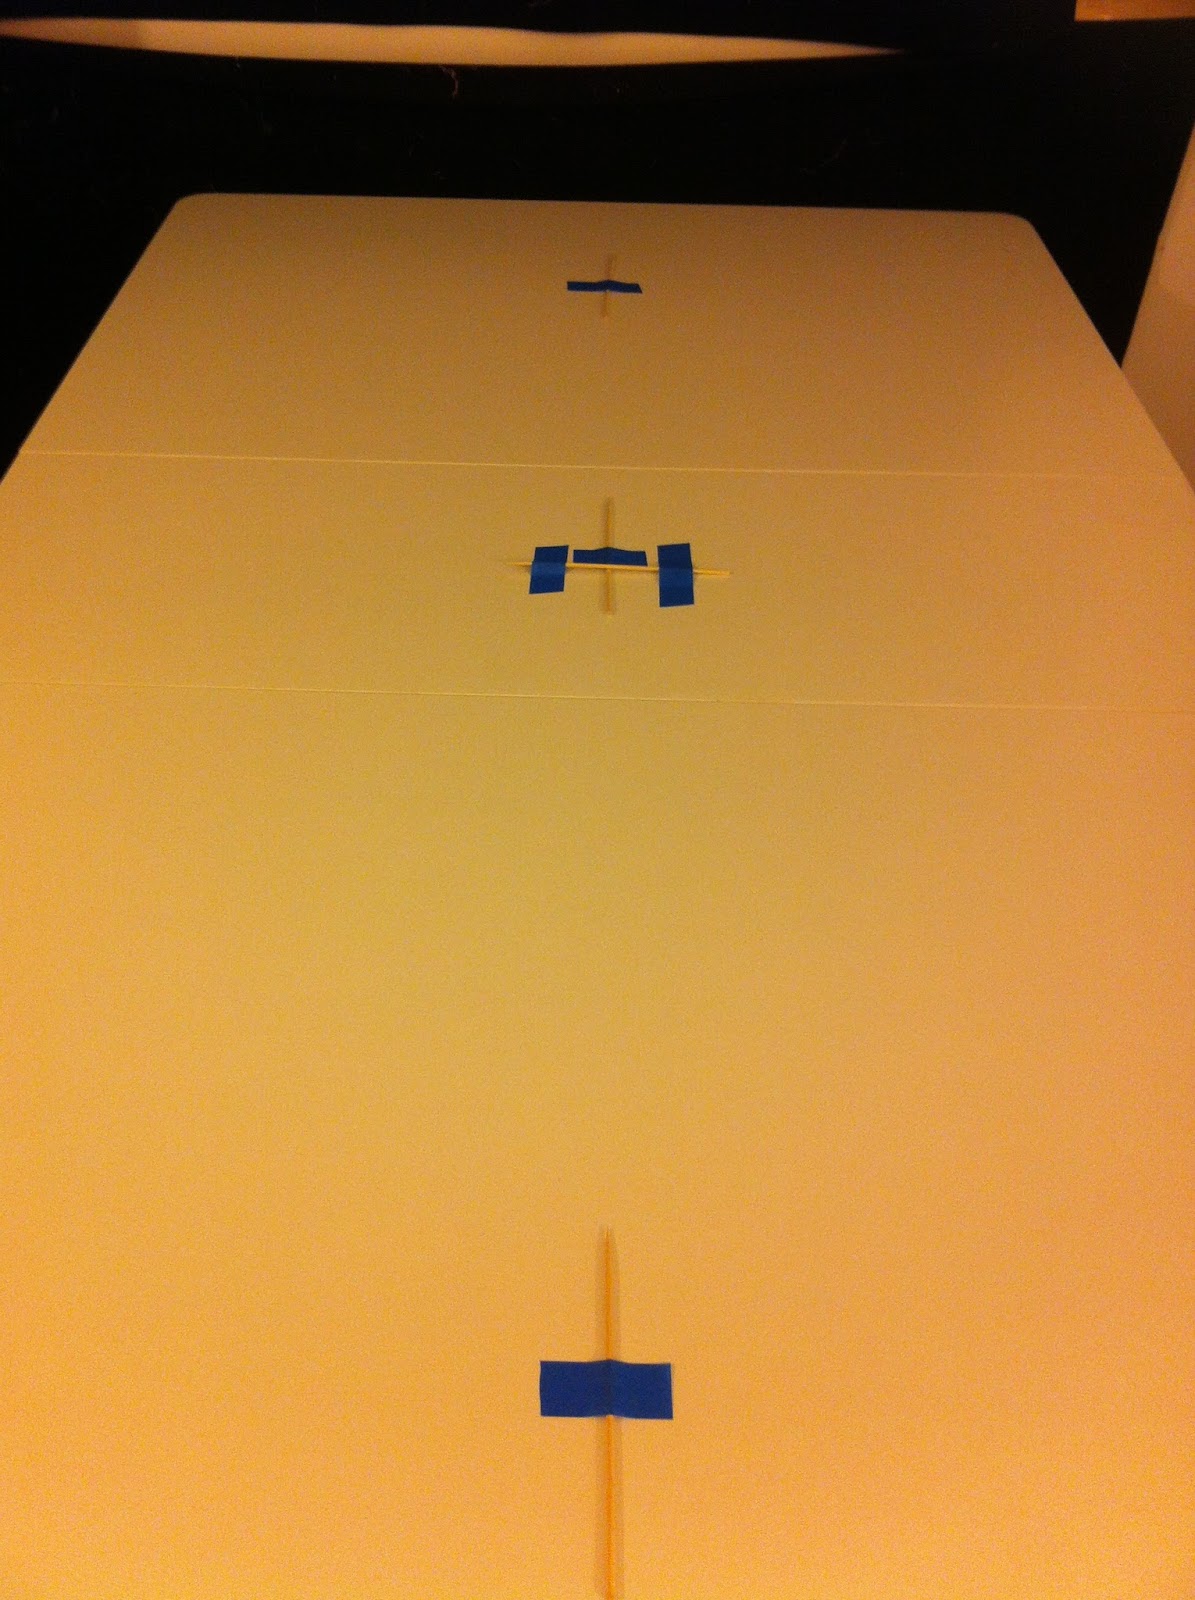
This is the table fully opened on both sides and I have marked my
centre points with kitchen skewers and blue painters tape.

Here I am placing the backing on the table.  Folded the backing in half,
placed the fold on the centre markers and then fold back the
other half.  Perfectly centred quilt backing!

Bulldog clips on one end, they hold the backing down and then I smooth it out and
place the painters tape up the other end.  This quilt is only 36" square.  If this was
a longer quilt, I would be using bulldog clips top and bottom.

Relaxing the wadding.  I don't hold the wadding down
with anything.  I use 100% cotton and it lays down quite nicely.
Once it is relaxed, I smooth it out with my hands.  It doesn't
shift after that.

The Storybook Quilt!  I used the same layout as my Mini Farm Quilt.
I love the different fabrics...  What are Little Boys Made of? on the outside border and centre
block.  Hey Diddle Diddle is the dark blue border.  Humpty Dumpty makes up the four corner squares
and I used coordinating fabrics for the four patch blocks.

A new toy I purchased at the recent Craft Show.
The Sasher by Pauline Rogers
Great for pressing binding and sashing strips for QAYG

I made the binding using a new gadget I purchased at the Craft Show.  It is called The Sasher and can be used to make the folded sashing that you use for Quilt As You Go (QAYG) or binding.  It makes multiple sizes too.  I cut my binding at 4" (or wider)  for children's quilts as I use a completely machine sewn binding technique, click here to read more about that method.  So this binding ends up at 2" folded so I used the 2" sasher for make my binding.  It's very easy and you can read more about it here.

Today is much cooler so I am getting ready to pin the quilt.  I will machine quilt this one on my Brother PQ1500....  I love quilting on this machine.

Happy Sewing!!
Cheers from Helen


Monday, 2 November 2015

BUILDING ANOTHER BOAT !

Another Boat Quilt that is:-)

Feeling out of sorts today so decided to do some mindless chain piecing. 

This time I am building the centre panel first and adding the borders before I do the hand blanket stitching around the boats. The pattern instructs you to do this but last time I did the borders first and then made the quilt top.  I wasn't that happy with how that worked out so this time I'm following the instructions!!

Cheers from Helen

(As I keep posting to my Facebook more than posting to my Blog, I will try to do a quick Post like this one more often! I'm Posting from my phone as that always seems to be right beside me!)

Thursday, 27 August 2015

TRIAL AND ERROR

I have started the quilting on the Farm Quilt.  If I plan to do some Free Motion Quilting on a project I always stitch in the ditch first, usually down most row seams.  As I had planned to try some FMQ around the farm animals, I started the ditch quilting on my Featherweight.  I had purchased the Stitch in the Ditch special foot and tried that but after a lot of help from April Henry from April 1930's Sewing Shop, I now understand how this foot works and will probably keep it for under stitching on bags and dressmaking.  It has a flange that sits in the ditch of your seam but the actual stitching lands just a hair to the left of the ditch.   Results vary using this foot.  A thicker seam allowance results in more of a ditch allowing the flange to sit in there well and the stitching lands closer to the ditch.  I like my "ditch" quilting to be well in the ditch.
Low Shank Stitch in the Ditch Foot

So after a few goes with the SITD foot, I switched to my Walking Foot for my Featherweight.  I love using this foot for straight line and channel quilting.  I had not used it for stitching in the ditch before.  Now I should add here right now that I own multiple sewing machines and one of them is my Brother PQ1500 which I use for most of my quilting - walking foot and free motion.  The walking foot for the Brother machine looks like this....   you can see right up the centre of the foot, up to the needle so you can really see where you are quilting "in the ditch".   The walking foot for my Featherweight does not have such a clear view of the needle and I found it difficult to stitch in the ditch accurately.  Now this could just be me because I'm so spoilt having the big Brother machine but anyway I eventually switched over to the Brother to finish the quilting.  I'm almost done!   I finished up the ditch quilting and now I'm doing some straight lines down each side of the seam, walking foot width.  I have not decided if I will do anything close to the animal embroidery as yet.

Brother PQ1500 walking foot
This sewing machine is straight stitch only.

Note the reminder on top of the machine -  last time I did
Free Motion Quilting I was having dramas and only
right at the end when I was almost finished I noticed
that one of the thread guides had been missed!
That won't be happening again!

So as you can see, it's all about trial and error.........  I love all of my sewing machines and I try and give each one a chore on a regular basis so each one gets some use and maintenance.  My Featherweight 222K is a great piecing machine (and very handy to take away from home for sewing as it's so small) and I love it for straight line, channel and free motion quilting on a small project. I have said this before.... I think it's the best Free Motion Quilting I have ever done.  I love the special foot that April sells for this purpose, it is the best foot I have ever used.    It's a great top stitching machine too.  My big Brother machine is great for all quilting especially Stitch in the Ditch and Free Motion.  So it's okay with me that my Featherweight won't be used for stitching in the ditch, she has plenty to keep her busy!

If you are new to my Blog and you're wondering how many machines I have... two treadles, one 201K knee shift, one 222K featherweight, one 99K hand crank, one Brother quilters edition and the Brother PQ1500.  and an overlocker!

A rainy cool day today (thank heavens! those hot days were a bit of a shock!!).  Tomorrow I will hopefully finish off the quilting and get the binding on!

Happy Sewing and Cheers from Helen


Wednesday, 26 August 2015

AND ON TO THE QUILTING

Suddenly we are thrown into Summer!  hot today and it should not be!  far too early for Summer to arrive but it does look like Winter has flown..... not perfect sewing weather!

I pinned the Farm Quilt today.....   here is how I do my pinning ......

I use bulldog clips at one end to hold the backing
and batting/wadding only.
I then tug the backing from the other end ensuring
that all is flat.  I do add a few
pieces of blue painters tape to that end just to
hold it where I want it.
I then smooth out the quilt top and wadding.


I like curved pins.  I have pinned this top ready
to stitch in the ditch to start with.
Once the middle area is pinned, I move the sides over
and pin those.


Setting up my Featherweight 222K
I am using the giant adjustable extension table
from Sewing Buddies Australia
I removed it from my Brother PQ1500 and was
surprised to find that it fit perfectly on to
my Featherweight with no adjustments needed!

Perfect fit!

As I had shifted the FW over to my other table, I brought
in my 99K hand crank.  I will give her some
work to do.  Look at that ! - the Feathermate table (also from
Sewing Buddies Australia)  from
my Featherweight fits nicely on to my 99K box.

In preparation for quilting I gave my FW bed a light polish

I am using Gutermann thread in the bobbin but Aurifil thread
in the top so I did have to play with the upper tension - moved it from 4 to just past 5
I took a photo to remind me!!

So I am all set to commence the quilting!


A lovely surprise in the mail today
Thank you Leonore!
An early birthday gift - I love the zipper purse, very clever!
and the little turtle is for cleaning your computer or phone screen - how
cute is that!

Happy Sewing!
Cheers from Helen