Hello!
So, how do I make the tea pot trivets?
 |
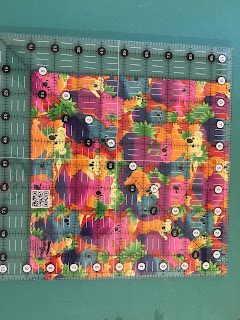
CUT TWO SQUARES 10" - 100% cotton fabrics
|
 |
DRAW A LINE 1/2" FROM TOP EDGE, MARK
IT ON THE RIGHT SIDE - DO THIS
ON BOTH PIECES OF FABRIC- I USE A LEAD PENCIL |
 |
PRESS OVER EACH TOP EDGE, USING THE PENCIL MARK
TO FOLD OVER TO |
 |
PIN THE TWO PIECES RIGHT SIDES TOGETHER, STITCH AROUND USING
A 1/2" SEAM ALLOWANCE.......LEAVING
THE TOP EDGE OPEN |
 |
| TRIM THE TWO BOTTOM CORNERS |
 |
TURN RIGHT SIDES OUT, POKE OUT THE TWO BOTTOM CORNERS
|
 |
| GIVE IT A PRESS. IT SHOULD NOW MEASURE ROUGHLY 9" SQUARE |
 |
MARK STITCHING LINES AT 1-1/2" INTERVALS
USE EITHER A LEAD PENCIL OR BLUE WASH OUT PEN BUT
YOU NEED TO WASH THAT OUT PRIOR TO FILLING
THE TRIVET
Note: IF YOUR SQUARE IS NOT 9", ADJUST YOUR CHANNEL MEASUREMENTS.
|
 |
| STITCH A 1/4" TOPSTITCH ALONG BOTTOM EDGE |
 |
| STITCH DOWN THE LINES, TOP STITCHING TOP AND BOTTOM WELL |
 |
| PLACE WHITE RICE AND CLOVES IN A LARGE BOWL |
 |
PLACE TRIVET INTO BOWL AND BEGIN TO FILL TO ABOUT HALF
FILLED WITH RICE & CLOVES MIX. REMOVE FROM BOWL AND PRESS
THE RICE MIXTURE DOWN FIRMLY FROM THE TOP - I FIND A FEW THUMPS
ON THE TABLETOP HELPS! NOW FILL WITH MORE RICE & CLOVES UNTIL
ABOUT 1-1/2" FROM TOP. YOU NEED THIS CLEARANCE TO ALLOW
YOU TO PIN ACROSS THE CHANNELS READY TO STITCH. |
 |
PIN EACH CHANNEL SO NO RICE CAN ESCAPE
BE CAREFUL - RICE CAN RUIN YOUR SEWING MACHINE IF IT
GETS DOWN IN TO THE BOBBIN AREA- DO NOT SEW OVER A GRAIN
OF RICE! YOU WILL BREAK YOUR NEEDLE AND THEN
PARTICLES OF RICE MIGHT GET INTO THE BOBBIN AREA.
SEW SLOWLY MAKING SURE ALL THE RICE IS TO
THE LEFT OF THE PINS- DO NOT REMOVE A PIN UNLESS
YOU REALLY MUST. |
 |
| AND HERE IS YOUR FINISHED TRIVET - FRONT |
 |
| AND BACK |
So that is how to make my trivet. I like to keep it in a ziplock bag to keep the freshness of the cloves. Rice can attract mice too so if you keep it in a baggie it should be safe. You could also store it in a plastic tub like Tupperware.
I do not make these to be used as heat packs although if you did not fill them as full as I do and you leave out the cloves, they could be used like that. Personally I do not like to add any oils like lavender.... a heat pack is meant to be placed in the Microwave Oven and lavender or any of those "feel good" oils can overheat and burn.
Of course this does not have to be a tea pot trivet! you can use this on your dining table to set a hot casserole dish on.
Cheers from Helen


Great tutorial. Thanks for sharing Helen.
ReplyDeleteYou're very welcome Jackie! You could use other spices instead of cloves.
DeleteGreat tutorial, Helen. I made just one a few years ago and filled it with several different herbs and spices. It was fun and easy and I don't know why I never made more! Such a great giftie! Thanks for the reminder and the excellent directions. Have a wonderful day!
ReplyDeleteThanks!! I made quite a few of these for Christmas gifts. I'll make some more for the Mother's Day stall my craft group holds, I think they would be a good seller. Bit late, but... Happy Thanksgiving to you!
ReplyDeleteThat is wonderful and I'll bet it smells heavenly too.
ReplyDeleteThis comment has been removed by the author.
DeleteMy sewing room smell so yummy!
ReplyDelete