
The Farm Quilt is all ready for its label and some finishing hand stitching..... here are the binding steps for using a wide binding.........
 |
| sew the binding to the front of the quilt - I'm using the walking foot as the seam width which is about a 1/4" |
I like to use the markings on the needle plate when attaching binding - as my walking foot gives me a 1/4" seam, I use that line marked on the plate to know where to stop and backstitch before turning the corner. You can just see the quilt top corner peeking out, when that gets up to that line I stop and backstitch and then turn and stitch off the quilt..... if you were using a wider seam width, you would just put a piece of painters tape or similar to mark your stopping point. I find this the most accurate method for knowing where to stop and backstitch.
 |
| stop with needle down when the corner of the quilt top reaches that 1/4 line (to match the seam width) |
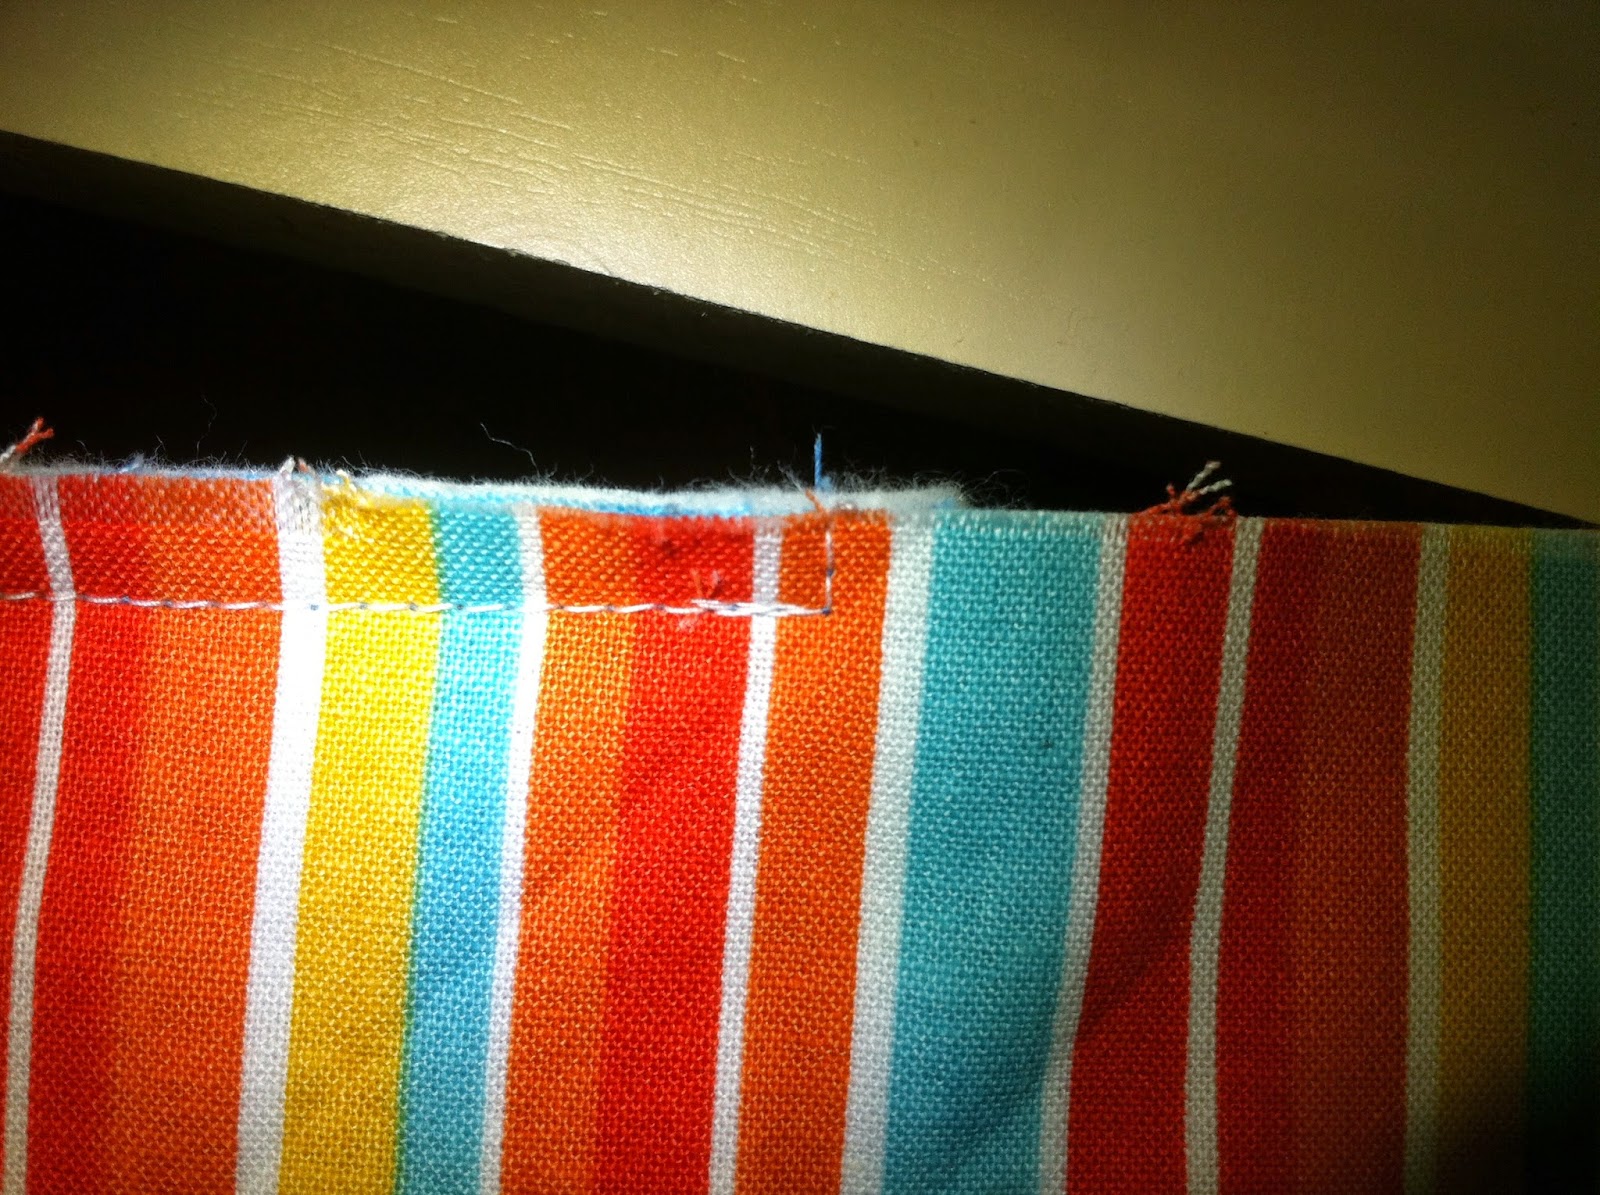 |
| backstitch first and then stitch off to the edge |
 |
| fold back as per usual and continue stitching all the way around the quilt |
I cut the binding at 4", this allows for a larger width binding on the back of the quilt (I'm using double fold binding not single fold) -once I've stitched all the way around the quilt, to finish off the binding I use a scrap of the binding to measure the overlap for joining the two ends together.......  |
| Use a scrap of the binding to measure the overlap |
 |
| join on the diagonal |
Once the binding is stitched to the quilt front, I then take everything over to the ironing board...... I press the binding away from the quilt top.....
 |
| Back on the ironing board, press the binding back away from the quilt top. |
 |
| Turn the binding over to the back of the quilt - I like to use the Jumbo Wonder Clips to hold everything in place - see the nice mitre in the corner! if you have trimmed your quilt top to a perfect 90 degrees and attached the binding as above, this mitre just forms itself! |
 |
| stitching down the back of the binding - yes on my machine! this quilt is for a little baby so I want the binding to be hard wearing for all those washes it will get! I use my walking foot and a longer stitch length. Yes, the stitches will show on the front of the quilt - they form another row of quilting in your last border ... this method works for plain borders but probably wouldn't suit a pieced or applique border. |
I will take some photos of the finished binding today, I'm up to attaching the quilt label and hand stitching those mitres down.
Happy Sewing!
Cheers from Helen


Look at those perfectly mitered corners!!!! Very nice, Helen.
ReplyDeleteWhat a great tutorial, Helen! Thanks so much for sharing!
ReplyDelete